How to use auto simulation in OPIFY options simulator
Dipendu | Oct. 27, 2024, 8:03 p.m.The auto simulation feature allows you to automate your trading simulations, making it easier to track market conditions or analyze specific scenarios over time. Follow this step-by-step guide to set up and control auto simulation, including how to stop it automatically based on customized metrics like spot price, time, or PnL.
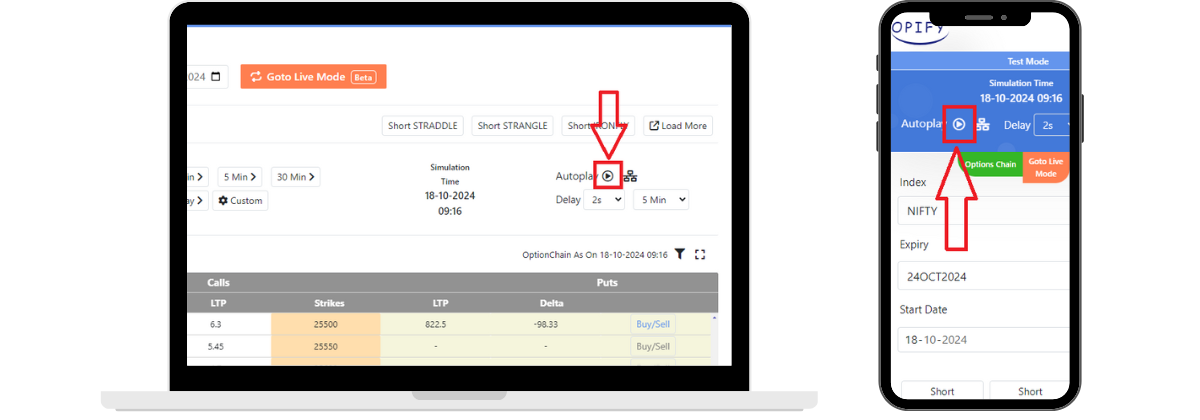
Step 1: Start Auto Simulation : To begin auto simulation, simply click the Play button on your simulator dashboard. This will start the simulation automatically, allowing you to observe market movements hands-free.

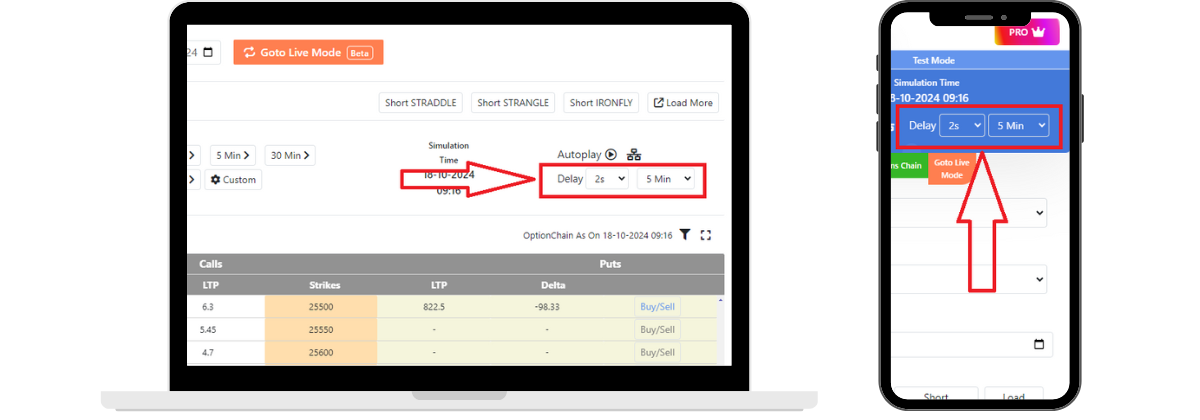
Step 2: Adjust Refresh Delay and Time Interval : For control over the speed of the simulation: You can set a refresh delay and time interval.
By default, the refresh delay is set to 2 seconds between each update.
1.The time interval is set to 5 minutes.
Adjusting these settings allows you to tailor the speed and frequency of the simulation to your preferences.

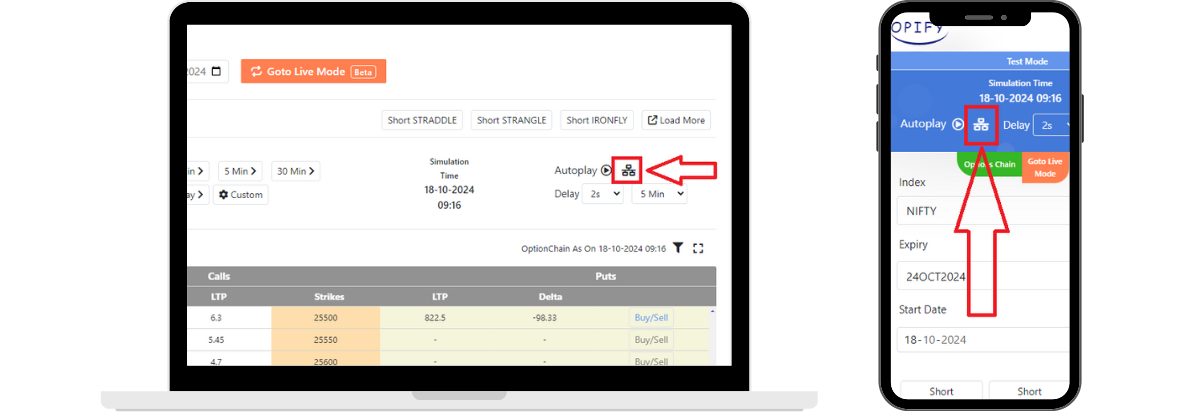
Step 3 (Optional) : Set Auto Stop Based on Custom Metrics : To enhance control, you can also set up an auto-stop function based on various metrics. This feature lets you define a condition that, when met, will automatically stop the auto simulation.
Options for auto-stop metrics include:
1.Spot Price
2.Time
3.PnL (Profit and Loss)

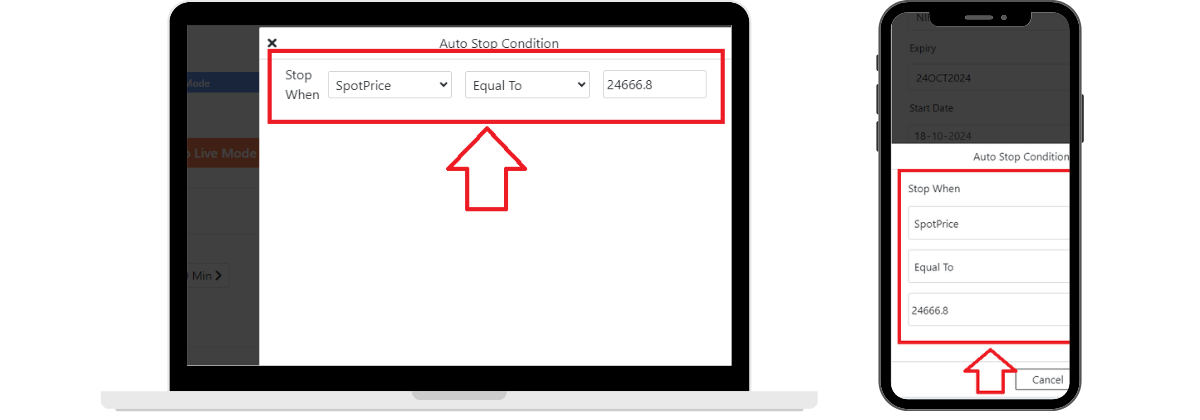
Step 4 (Optional) : Configure Auto Stop Criteria : To set up auto stop based on specific metrics:
1.Select your desired metric (e.g., Spot Price).
2.Choose a condition (e.g., Equal To).
3.Enter the trigger value that will stop the simulation once reached.
For example, if you select Spot Price as the metric, set the condition to "Equal To", and enter a value of 24666, the auto simulation will stop automatically once the spot price hits 24666.

Auto simulation can help you keep track of market conditions without needing to manually monitor each step. With the ability to set custom stop conditions, you can focus on analyzing outcomes rather than constantly managing the simulation. Happy trading!
Related Blogs